Running a Counter-Strike: Global Offensive server has been streamlined to the point that the most technically difficult part of the process is enabling port-forwarding on your router. Technically, you could even run your server without the use of port forwarding, but then only the computers on your subnet will be able to reach it (and it won’t be navigable via the in-game server browser). So, if you’d like to run your own server online just follow these steps:
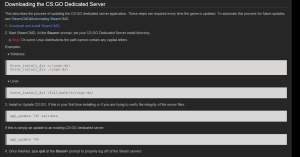
1) Check out the sections “Downloading the CS:GO Dedicated server” and “Starting the Server” at Valve’s CS: GO Server article. These two sections show how after one download and 4 lines of typing on the command prompt you can have a local server up and running.
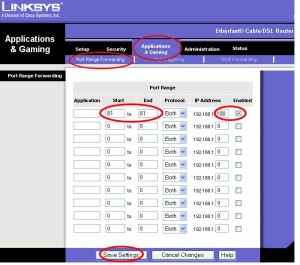
2) In order for your local server to show up in the server browser for other players you’ll have to be sure your server’s port (defaults to 27015) is reachable via your public IP address. If your server is connected directly to your modem you can skip this step completely, though most users are behind a router. In order to make port 27015 from your computer available to the public you’ll have to enable port-forwarding on your router. An image of a port-forwarding page on a Linksys router is below, for more information on how to port-forward for your specific router Google is your ally.

Linksys port-forwarding. In the case of CS: GO set the start and end values both to 27015, leave “Protocol” as both, and set the IP Address as your computer’s IP. Image courtesy of z2software.com.
3) That’s it! Seriously, if port forwarding worked successfully and you were able to start up your server using step 1 then your server is online and can be found using the server browser in game. Once you feel comfortable running your server you should check out the “Advanced Configuration” section of the link in step 1 for info about switching up levels, bots, and more. For more information about bandwidth requirements (likely to be the biggest constraining factor on your server), check out Whisper’s tickrate article, more specifically the section on bandwidth calculation.
Below are a few changes I make to the standard server configuration:
-maxplayers_override 18 //include this on the srcds command line to start the server. This is the only way to switch the max number of players (switch to any number you want obviously, 18 is my server’s max)
In autoexec.cfg:
log on //This is set to turn on logging! Don’t put this in your server.cfg
In server.cfg
hostname “MyServer!” //This is the name that will appear in the browser list
rcon_password “serverPassword” //This is the remote connection password, set it to a unique value only you know otherwise players can modify your server values!!
sv_password “” //Only set this if you intend to have a private server!
mp_freezetime 5 //The amount of time players are frozen to buy items
mp_join_grace_time 15 //The amount of time players can join teams after a round has started
mp_match_end_restart 0 // Defines whether a map should be restarted after a game has ended
sv_cheats 0 //This should always be set, so you know it’s not on
sv_lan 0 //This should always be set, so you know it’s not on
//**The bot commands below are mostly default with the exception of
bot_difficulty 3
bot_chatter “off”
bot_join_after_player 0
bot_quota 10
bot_quota_mode “fill”
//**The following commands manage kicks and bans
exec banned_user.cfg
exec banned_ip.cfg
writeid
writeip

